Quilts And All Things Fabric...

As an avid fabric enthusiast, a blog about quilts and all things fabric just seemed the obvious thing to do.

Saturday, December 14, 2013

One Quick Step Closer


Step/Clue 3 nudged the quilt one quick and easy step closer to fruition.
 
Usually I take lots of pictures during the progress of the step; but this week it was so easy and quick lots of random photos seemed unnecessary.
 
Simple and easy Half Square Triangles with half of them turned into Pinwheels.
 
My method of choice was to use the Easy Angle ruler as demonstrated by Bonnie in the tutorial. Although I did make one group using the "Magic 8" method. It's a quick, easy, and very accurate method. You can find several tutorials and You Tubes for that technique. Just give it a Google. But for those curious now, here is a little diagram that shows stitching lines and cutting lines. To obtain the 2" HST for this clue just start with a 4 3/4 inch square of Orange and Yellow (or whatever colors you may be substituting). Stack them up, mark the diagonals corner to corner and sew 1/4" on either side of both marked lines (stitching shown with dash lines ----). Then measure in from the side 2 3/8" and down from the top 2 3/8". The lines should intersect at the center of the X mark. Cut apart starting with the vertical and horizontal lines drawn last. This produces 4 squares with the double stitch line on the diagonal. Then cut these units apart between the stitches on the first lines drawn. Easy! 
 
 
Here are the finished HST's and Pinwheels.
 
 
With the holiday season rapidly approaching, I will be behind for at least the next two clues. But don't worry, it will all be worth it because I will be playing with grandkids! And will catch up as soon as possible.
 
I hope all of you that are making Celtic Solstice are thoroughly enjoying the journey.
 
See you all in a couple of weeks.
Kathy


Sunday, December 8, 2013

Celtic Solstice Step 2


Week 2 of the Celtic Solstice Mystery Quilt brought Chevrons our way!

Ok, so that may not excite many of you but it did me because they are "easy-peasy" units to put together. That means a quick clue week and back to working on other Christmas projects...even though I love doing the mystery there are some other projects that just NEED to be finished up.

Since I am doing the smaller quilt, and using a limited fabric selection, the cutting went fairly quickly.  Here are all the pieces needed to construct 100 Chevron blocks.


After getting all the pieces cut, next step was to mark diagonal centers for the corner pieces. That meant marking all the white and all the yellow squares. Time consuming, but necessary to get nice straight seams for a good fit later.
 Here is a one of the units going through the machine. Notice how the needle is just to the side of the line (on the side that gets cut off). This gives that extra little needed for the fold over to be just the right size.
In the photo above, the polka dots on the white show through to the back side very clearly. This is a fun fabric. But it is a white on white, and very difficult in certain lighting situations to distinguish right and wrong side. Glad to have the stitching line mark in place on the wrong side of the fabric. Don't want to admit  how many times in past projects I have had to rip out and re-stitch because of not "seeing" the difference.

The key to a good join of the two sides is ironing the seams in opposite directions. For example, side 1 iron in one direction - up, side 2 iron in the opposite direction - down. I didn't take pictures of this step, but check out Bonnie's tutorial for good photo examples. Then join by "nesting" the seams. My preferred  method for these units was to nest the seam where the white/neutral and green met, then align the two fabric pieces upward to the top and start to sew. I sewed about half way down the white/neutral section, peeked to check on the "nested" seam and made adjustments if necessary. Sewed on through the "nest" and half way through the green section. Then again checked the "nested" seam and sewed on the end. I started out pinning these, but found it worked better for me to just nest them and check them as they were sewn.

And are all the completed Chevrons stacked up and waiting for their place in the quilt.
I am hoping that the different swirl patterns in the fabric adds an element of movement to the quilt. It will be a wait and see situation.
 
****
In past blogs I have included a segment of what I called "Garden Variety Inspiration". This included photos of various things in the vegetable garden, or flowers in the yard that inspired ideas for color and or texture use with textiles. This time of year, it is difficult to come up with beautiful blooms, or colorful vegies to photograph. But Mother Nature has come through for us with some lovely snow and ice covered ornamental grass tassels. I thought this appropriate for this blog because of the use of neutrals/whites in the mystery quilt. These almost look like black and white pictures, but they are in full color. Just taken on a very grey day. And I refused to venture off the back porch to take the pictures. Yes, I am a wimp.  There is even a little contrasts in the neutrals of the white on cream and especially with the grey background.
 See the grey in the cream of the tassels?And the grey background? I love the use of grey in quilts.

Here is the big picture.


Hopefully these photos stirred up some inspiration or at least piqued you interest.
Well, that's all until next week when we get to see what clue/step 3 has to offer. Until then quilt on!
Kathy

Sunday, December 1, 2013

Celtic Solstice - The Mystery Begins

It's that time of year again.
 
 Time for annual Bonnie Hunter's Mystery Quilt.  This year's mystery is named Celtic Solstice.
 Her color choices are Green, Blue, Orange and Yellow, a perfect reflection of the Irish countryside.

But before I get into this years project and show off my color choices and first step let me share with you some other tidbits about me and my quilting.


I must admit to being a bit of a rebel when it comes to Scrappy. Scrappy really isn't my thing. My style is much more "Matchy-Matchy", so it is really a stretch for me to go totally scrappy in the quilts. Besides, my stash is almost nonexistent, so when starting a project there isn't a lot to choose from to go scrappy. So that usually means a trip to the fabric store for yardage or FQ's.

This will be my FOURTH Bonnie Hunter Mystery Quilt. My first one was Orca Bay and I love that quilt. Ok, so it's still a quilt top because it hasn't been finished....yet. I stuck as much with the scrappy technique as I could on it, but was limited to fabrics available. I switched the colors out on it to purple, pink and greens. You can find photos of the Orca Bay quilt progress in my previous blog posts here.

Then came Easy Street. I stuck with Bonnie's  colors on it, but went much more "matchy" and limited fabrics to only a few of each color. It was finished just last week in time to go on the guest bed prior to my daughter and granddaughter arriving for Thanksgiving. Here it is on the bed! I LOVE this quilt, too! The colors are much more vibrant than they appear in this photo. (You can find photos of Easy Street in older blog posts, too.)

I also did Lazy Sunday, which ran in Quiltmaker magazine last summer. I again went with Bonnie's color selection, but pulled strictly from my stash. It is mostly scrappy, but I must admit to again doing some "matchy-matchy" units on it. Just can't help myself! It's the way I am. LOL
Here is Lazy Sunday:
 
The backing is purchased for this one. It's batting got used in Easy Street. Oops. This quilt was actually made for a special purpose. We have an oversized Sheltie named Murphy that is NOT allowed on the couch. Yeah, right! See how innocent he pretends to be? "Who me, on the couch, never!" Except his fur all over it gives him away every time!
He only gets up on the couch when we are not home. So, intent is for Lazy Sunday to be the couch quilt when we are gone. Much easier to throw the quilt in to wash than getting fur off the couch.

I have taken quite a bit of flack from a few people about my NOT doing Scrappy in these quilts. But one VERY IMPORTANT thing to know. Bonnie's patterns/designs are EXCELLENT and work wonderfully whether you are a Happy Scrapper or a "Matchy-Matchy" Traditionalist like me.

Just go out there and make Beautiful Quilts!

Now, for this years FUN! I'm sticking with Bonnies colors, but in a limited number of colors.
 
I have added one more blue to the stack and am considering switching out one of the yellows because I like the way the other color "plays" better. Or may just add it as a 4th yellow to the group. Will make that decision when we start cutting and using the yellows.  I also purchased a 4th green that includes. Here are the additional colors.
That green was just too much fun not to incorporate into the quilt.

The first clue/step in this mystery was an easy one using the TriRecs Rulers. Bonnie has also teamed up with Linda Franz at Inklingo if you don't want to use the rulers. I still may try this technique, but not sure my little old printer can handle the fabric. Hey, it balks at running an envelope though and just loves making paper jams. Usually does ok if set to specialty paper, but still iffy. May just be the incentive I need to get that new printer I have been wanting for awhile.

Anyway, I got busy and cut and sewed step one. Quick and easy this time. Here the units are all laid out and ready to sew.
 The chain has been started. These units match up great and go together quickly.
 Here are some of the white units with one "wing" attached all lined up for pressing. Remember the hint from last year to keep the chain together for pressing? It works great! Much easier than picking up each unit one at a time to iron.
 And here are my Step/Clue 1 units all finished shown with the TriRecs Rulers.
I know, I know....not scrappy....too "matchy-matchy" for some of you. But trust me, this will work!

Thanks Bonnie, for another great mystery. Can't wait to see how this one turns out!


Little Misses Apron

Lily modeling her apron.
Lily NEEDS an Apron
 

The day before Thanksgiving we decided Little Miss Lily needed her very own apron. She is only three, but LOVES to help in the kitchen, and is actually a very good helper. Her only issue is the she ONLY wants the IMPORTANT jobs. And she determines just what those are.

My daughter and I went scrounging around in my very limited fabric stash and finally came up with the makings for one fantastic apron. There was no pattern for this. We just created as we went along.

The purple ruffle, binding and tie fabric was some yardage that had been purchased for a quilt back. But got put back into the stash because I decided I didn't really like it for the backing. And besides, it came up short for yardage. Not sure how that happened, but pretty sure I need to start watching yardage being measured before it's cut more closely.

The cherry print, three sections big pocket was part of a left over Fat Quarter. And the little green heart pockets on top of the cherry fabric was literally a scrap barely big enough to use. The little green heart pockets are lined with some yellow  that was also a barely big enough scrap piece.

The big question became what fabric to use for the main body of the apron. Do you every just come up with an idea and have no idea where it came from??? That's sort of what happened here. I pulled out the craft box container and right there on top was a bundle of those oversized 100% cotton tea towels. YES! The light bulb came on. (It does happen occasionally.)

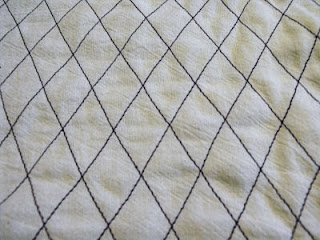
We folded the towel in half and cross hatched it with purple thread. This made our "fabric".
 
Since Miss Lily is a tiny little thing, we didn't need a huge amount of base fabric. So, we cut our "fabric" unit in half. Then we literally held it up to her and drew on shape from the neckline to under the arms that needed to be cut out.

For the big Cherry fabric pocket, we started by making the ruffle. We cut a strip of the purple yardage fabric twice as wide as we wanted the ruffle, folded it in half and gathered the raw edge. We just folded what was left of the Cherry fabric FQ in half and trimmed it up to fit the apron base. Folded it in half  right sides together with the ruffle inside (making a tube). Stitched it up and turned/pulled it right side out and topstitched the upper folded edge for stability.

My daughter free hand drew the little heart pattern to fit the fabric we had. We made a template from freezer paper and cut out two green and two yellow hearts. Sewed them together leaving a small space on the side for turning. Ironed them, and topstitched the tops of the hearts. Then sewed the heart pockets onto the Cherry fabric pocket. A girls apron needs LOTS of pockets you know.

We then went back to our purple yardage and cut fabric for the back tie/bow. Again, doing it the easy way, we cut a strip WOF twice as wide as we wanted the actual tie to be. Cut the strip in half to make the left and right tie pieces. Folded each piece in half and sewed a 45%  line on one end of each piece to make our nice bow end point. Then sewed the sides and turned and pressed. Attached these to each side on the back.

Then back to our yardage and did a 1/2 yard cut to make the continuous bias binding for the edges of the apron and the back neck ties. My daughter did the markings, I did the sewing, and she did the cutting. We made the strip 1" wide which gave us a nice 1/4" binding strip to work with. We cut a piece and bound the neck piece across first. Then measured center of the binding strip we had left and pinned it into place starting at the bottom center of the apron. This gave us way more than we needed on each end for our neck ties, so we just cut off what was extra. ( I can use those left over pieces in string blocks, so really no waste.)

Oh, and I almost forgot. We embroidered her name in Hot Pink.

Here is Lily modeling her apron once again. This time it is actually "in use". She is putting the dinner rolls in the pan.  Back view shows the bow and neck ties.
 
Here is the full apron photo laid out so you can see the pockets better close up.  We had a lot of fun creating and making this for the up and coming "Chef" of the family.