| Lily modeling her apron. |
Lily NEEDS an Apron
The day before Thanksgiving we decided Little Miss Lily needed her very own apron. She is only three, but LOVES to help in the kitchen, and is actually a very good helper. Her only issue is the she ONLY wants the IMPORTANT jobs. And she determines just what those are. My daughter and I went scrounging around in my very limited fabric stash and finally came up with the makings for one fantastic apron. There was no pattern for this. We just created as we went along.
The purple ruffle, binding and tie fabric was some yardage that had been purchased for a quilt back. But got put back into the stash because I decided I didn't really like it for the backing. And besides, it came up short for yardage. Not sure how that happened, but pretty sure I need to start watching yardage being measured before it's cut more closely.
The cherry print, three sections big pocket was part of a left over Fat Quarter. And the little green heart pockets on top of the cherry fabric was literally a scrap barely big enough to use. The little green heart pockets are lined with some yellow that was also a barely big enough scrap piece.
The big question became what fabric to use for the main body of the apron. Do you every just come up with an idea and have no idea where it came from??? That's sort of what happened here. I pulled out the craft box container and right there on top was a bundle of those oversized 100% cotton tea towels. YES! The light bulb came on. (It does happen occasionally.)
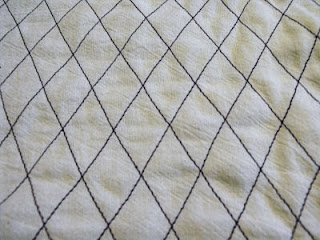
We folded the towel in half and cross hatched it with purple thread. This made our "fabric".
For the big Cherry fabric pocket, we started by making the ruffle. We cut a strip of the purple yardage fabric twice as wide as we wanted the ruffle, folded it in half and gathered the raw edge. We just folded what was left of the Cherry fabric FQ in half and trimmed it up to fit the apron base. Folded it in half right sides together with the ruffle inside (making a tube). Stitched it up and turned/pulled it right side out and topstitched the upper folded edge for stability.
My daughter free hand drew the little heart pattern to fit the fabric we had. We made a template from freezer paper and cut out two green and two yellow hearts. Sewed them together leaving a small space on the side for turning. Ironed them, and topstitched the tops of the hearts. Then sewed the heart pockets onto the Cherry fabric pocket. A girls apron needs LOTS of pockets you know.
We then went back to our purple yardage and cut fabric for the back tie/bow. Again, doing it the easy way, we cut a strip WOF twice as wide as we wanted the actual tie to be. Cut the strip in half to make the left and right tie pieces. Folded each piece in half and sewed a 45% line on one end of each piece to make our nice bow end point. Then sewed the sides and turned and pressed. Attached these to each side on the back.
Then back to our yardage and did a 1/2 yard cut to make the continuous bias binding for the edges of the apron and the back neck ties. My daughter did the markings, I did the sewing, and she did the cutting. We made the strip 1" wide which gave us a nice 1/4" binding strip to work with. We cut a piece and bound the neck piece across first. Then measured center of the binding strip we had left and pinned it into place starting at the bottom center of the apron. This gave us way more than we needed on each end for our neck ties, so we just cut off what was extra. ( I can use those left over pieces in string blocks, so really no waste.)
Oh, and I almost forgot. We embroidered her name in Hot Pink.
Here is Lily modeling her apron once again. This time it is actually "in use". She is putting the dinner rolls in the pan. Back view shows the bow and neck ties.
Here is the full apron photo laid out so you can see the pockets better close up. We had a lot of fun creating and making this for the up and coming "Chef" of the family.


No comments:
Post a Comment